Recently, I have been playing around with my terminal and trying to learn it better and make the most out of it. Upon googling stuff, I came across a course by WesBos with the title Command line power user. Having been familiar with Wes Bos before and his top courses, I thought of giving it a try.
So basically this article is all about what I have learned from watching that course. If you prefer to watch the course you can do so here.
Zsh
If you are on mac (and some linux OSes) the default shell is bash. While bash is great at what it does, it can become a bit limited in terms of configuration. What I mean by that, is you can't easily add plugins, themes and by default it's features are limited. So Zsh on the other hand, is superior in many places including but not limited to - more robust auto-completion, easier path traversing, support for git commands completion out of the box etc.
Oh-my-zsh
So people went a step further and developed a "framework" on top of zsh, called oh-my-zsh which can extend the zsh shell even further with functionality such as plugins and themes among other things.
Installing Oh-my-zsh
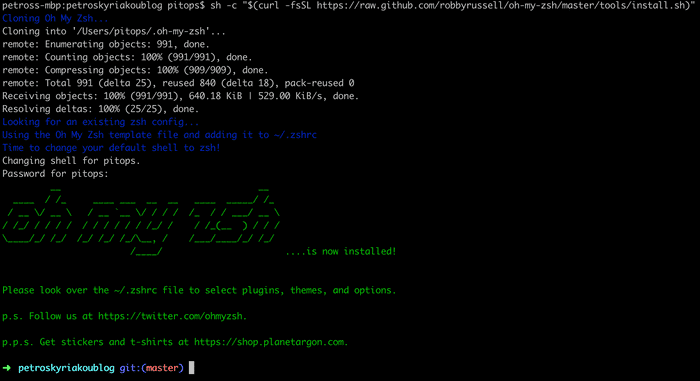
You can run the following command to one-click install zsh and oh-my-zsh
sh -c "$(curl -fsSL https://raw.github.com/robbyrussell/oh-my-zsh/master/tools/install.sh)"Customizing the theme
After successfully installing zsh on your computer you should notice a change in your prompt, adding colors and the git branch (if you are in a project using git) like shown below.
In order to customize the feel and look of your terminal, you need to install a terminal that can support theming. One of the popular ones is iterm2 and its the one that I will be using here.
There are a ton of themes for iterm which you can use but I will be using the one Wes Bos created. If you are following along, download the repo from WesBos, extract it and open up iterm.
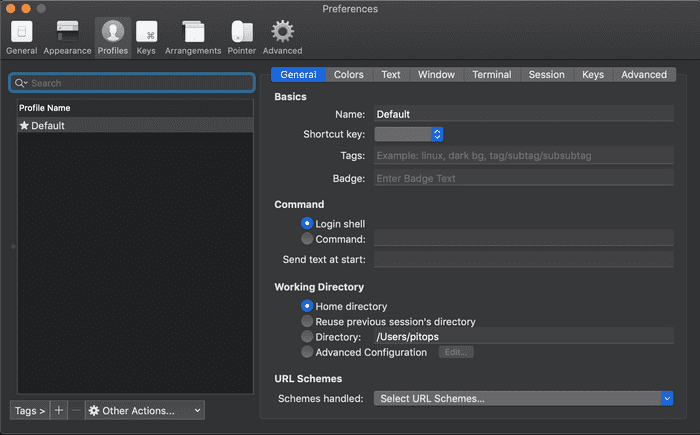
Press cmd + , to open up iterm settings.
Navigate to profiles and create a new profile. You can name this profile whatever you want.
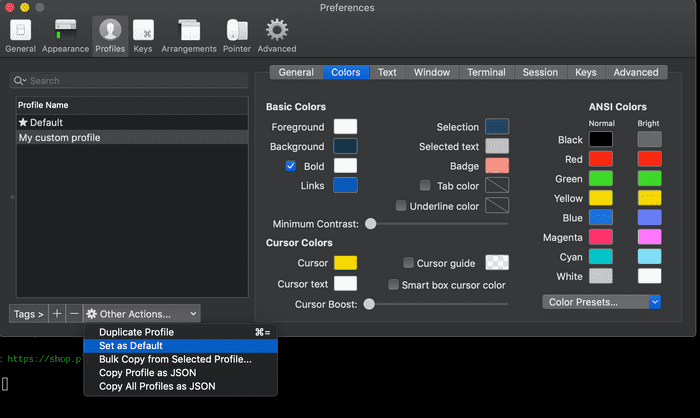
Next, with your profile selected, click the other actions button and click set as default.
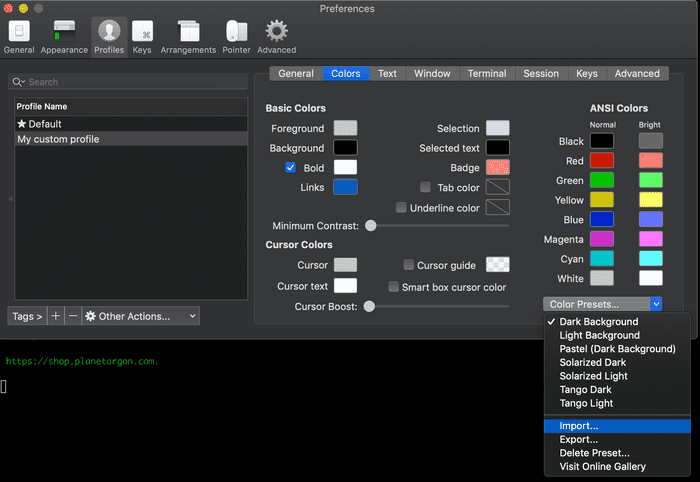
Now, to apply the theme you want, you need to click the colors tab and in the color presets dropdown selected import. Navigate to the extracted folder for the theme you want and choose the file that ends in .itermcolors and load it.
Then from the same dropdown select the theme you just loaded.
All you need to do now, is close settings and re-open iterm or press cmd + t to open a new terminal tab. The new tab should look something like the following.
Customizing the prompt with themes
Remember when you first installed oh-my-zsh that the prompt changed? Well, there are a lot of various ways to "style" the prompt and a lot of open source ones. You can view them here. These are also called themes but do not confuse them with iterm themes. Iterm is a terminal, zsh is a shell.
So, the part that you can customize in terms of applying a theme is the prompt. Wes Bos also created a prompt theme which is also supplied in the same repo as the iterm theme.
In general, the configuration for the zsh shell is a file called .zshrc and it can be found in your root directory. Lets open this file up. I will be using Visual Studio Code but you can use your favorite text editor.
code ~/.zshrc
In that file, you should find a ZSH_THEME="robbyrussell" line of code. You can change the theme by replacing the name. Zsh looks for themes in the themes directory under /Users/<username>/.oh-my-zsh/themes/.
So, in order to use the theme Wes Bos created we need to paste the cobalt2.zsh-theme file in that folder. And then change the theme name in .zshrc.
ZSH_THEME="cobalt2"
Now, reload the zsh config file by either opening a new tab, re-opening iterm or running the following command
source ~/.zshrc
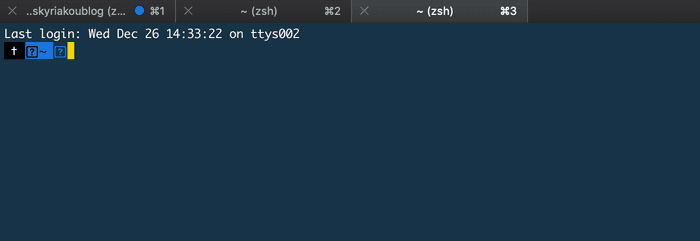
You should now have a changed prompt theme looking like this.
You will also probably notice that there are some question-mark symbols and thats because the font in our terminal does not support them. Luckily we can use patched fonts that can support these "symbols" and they are free.
Fixing the symbols
Navigate here and click the name of a font. I will be using inconsolata in this example.
You need to download the .otf file, so simply click on it and then click download. If you are on Mac double click it and then press install font.
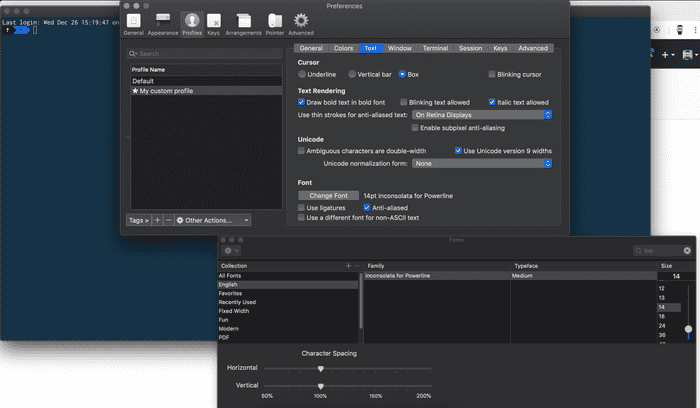
Now we need to select this font in iterm. Open up the iterm settings by pressing cmd + , and navigate to the profile you created. Select the text tab and click on the Change font button.
Search for the font you want to use and click on it. Immediately you should notice that the strange symbols are gone. You can change the font-size depending on your preference and close the settings window.
Note: Make sure that the profile you created is selected first.
Fix the terminal in VS Code
If you using VS Code and you use the internal terminal, you will notice that the symbols are still there. That is because you need to change the font used by the internal vs code terminal to use the one you downloaded above.
Open up settings and search for terminal font. Where it says font-family write Inconsolata for Powerline (change that to your preferred font) and you are done.
Note: Sometimes in order for VS Code to use zsh you need to restart your computer.
Z power
As I said earlier, with oh-my-zsh it is possible to use plugins and z is one of the most awesome plugins I ever used.
So what is Z? Lets see an example below
Do you spend lots of time doing things like this?
cd this/is/the/path/that/i/want/so/i/type/it/all/out/to/get/whereiwantWith Z, you could just do this:
z whereiwantAnd you are probably wondering, HOW? Well, Z creates a database with the paths you previously visited and then applies a weight. Depending on how frequently you are using a folder the weight is bigger. To better understand this, lets say we have a directory called react and a directory called react-with-nextjs.
If the past week I used(went to directory) react 2 times and only visited the react-with-nextjs 5 times, then if I type z react it will switch to react-with-nextjs directory due to its weight being more, as I visited that directory more frequently.
Anyhow, the point is that using Z you can save a lot of time and effort.
Installing Z
Using homebrew
brew install zBy downloading it from here
https://github.com/rupa/zIn both case you need to at its path to .zshrc
code ~/.zshrc and add the following line (notice that if you install using homebrew it will give you what path to use) below ZSH_THEME. If you installed it without homebrew you need to extract it and specify the path manually. I am giving you the path for where homebrew installs it below.
# Load Z
. /usr/local/etc/profile.d/z.sh
Using Z
As I said, Z needs to build a database first in order to be functional, hence when you first install it, you need to manually navigate to the directories as you were used to using cd. After a week or so (even after navigating to some directories) you are ready to use Z.
I will only give three commands below which I find to be the most useful but you can check the documentation if you want to dig further.
Navigating a directory
z directory-nameGo to previous directory
-Yes thats just a dash. Awesome right?
List all directory names that start with said text
z react -lTrash instead of perma-deleting files
So if you ever used rm -r <directory-name> you will notice that the files are permanently deleted and your trash bin is empty. Wouldn't it be better and on the safe side if you could retrieve these deleted files?
Trash-cli does just that. It is a node package, that instead of deleting files it moves them to the trash bin.
Install
sudo npm i -g trash-cliUse
Instead of rm -r <directory> OR rm <filename> you can now use
trash <name of file or directory>Note: You need to have NodeJS installed to use it.
Useful Zsh shortcuts
List files
Zsh provides an alternative to using ls -la to list all files with permissions etc by just writing ll. 1 point for Zsh, yoohoo.
Create and cd into a directory
Instead of using the following
mkdir react && cd reactHow about this?
take reactSearch for previously used commands
Have you written multiple commands and don't recall the specific one you want but have an idea what it contains?
By pressing ctrl + R you can use Zsh to search for the previously used commands easily.
Another way to do the same is when you used for example multiple git commands but want to recall a specific one. You can start writing git, press space and then press the up arrow key until you find the command you want to use.
Clear console and console history
If you want to clear the console and history
cmd + R
To just clear the current console but be able to scroll up to see history use
cmd + K
Better tab autocompletion
Say you are searching for a directory but you have two directories that start using the same name. Pressing tab multiple times will select a new directory from the list each time.
If you also want autocompletion for commands, say you forgot what the command for stashing changes in git is, you can write git press space, and then use the tab key to view and select one of the commands.
Conclusion
I hope you learned something today, as I did, and don't forget to reply in the comments below if you have found something interesting and would like the world to know about it. Until next time.
